Follow the step-by-step guide below
You’ve opened your doors for business, and you can’t wait to get things going. As you set up your systems, you start to wonder about phones. Should you use your personal cell phone or get a fancy office phone system? Hm… what to do!
Let’s be real: wires, bulky phones, and a big headache are not what you want in setting up a phone system. As a small business or startup owner, you want something seamless and easy as pie. That’s why we’re going to show you how to get going in 30 minutes. All you need is a cell phone or landline!
Follow the step-by-step guide below and have your business phone system set up completed in as little as 30 minutes.
Choosing a Phone System
Before you get started with your setup, you’ll need to choose a phone system. As a startup or small business, one dropped call could make the difference between viability and entrepreneurial failure. A virtual phone system (like Grasshopper) is reliable and extremely affordable—the perfect solution. Not only can you take advantage of extensions and online phone management tools, you can also complete your setup on your own without spending hundreds of dollars for professional installation services.
Step 1: Sign Up and Pick Your Business Number
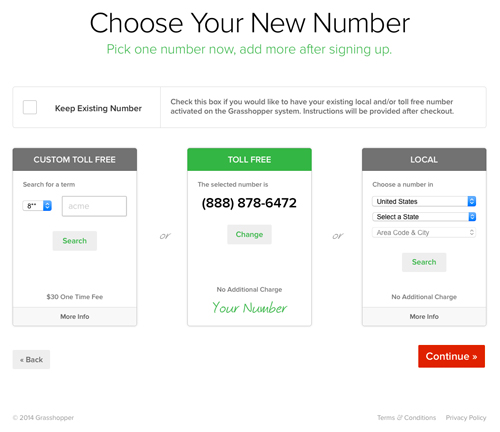
The idea of setting up a phone system with multiple extensions may seem like an impossible dream. Because Grasshopper is a virtual phone carrier, installation does not require knowledge of telecommunications, wiring, and receivers. You simply have to sign up, then pick a number. You can forward this number to any existing cell phone or landline.
You can select either (or both) a local or toll-free number for local and long-distance customers. You can even get a vanity number (like 1-844-GRASSHOPPER) to show off your brand. If you want to keep an existing number, you can do that, too. The world is your oyster—choose a number.
Looking for the perfect number for your business? Look no further.
- Join over 300,000 Entrepreneurs
- No expensive hardware to purchase or install
- Forward calls anywhere, any time

Step 2: Record Your Main Message
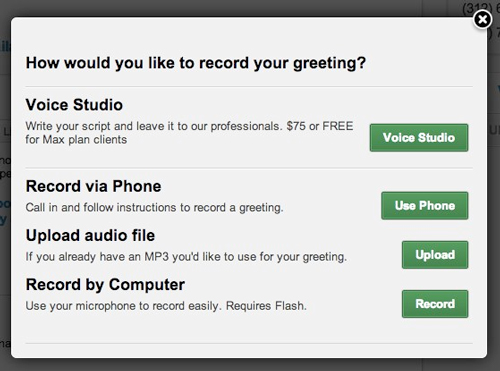
Once you have selected your phone number, you can record a custom greeting. This message will be the first thing customers hear when they contact your place of business, so make sure the message is well-versed and professional. Choose a team member with a polite tone and follow the prompts to set your recording (if you don’t have team members with voices perfect for phone greetings, we offer a professional voice studio feature).

Step 3: Adding Extensions
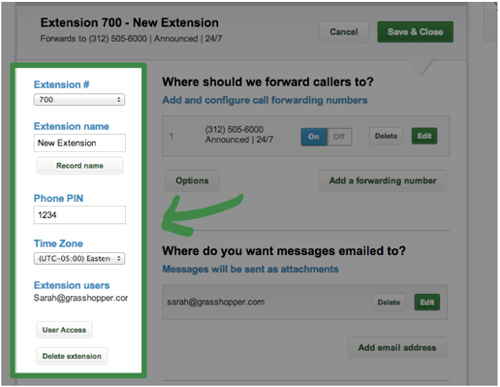
Extensions allow you to set up individual extensions for employees and executives at no extra cost. You can also add department extensions for larger offices. When a customer calls, they will be given the option to call a specific extensions to reach a specific person/department or search by name.

Step 4: Start Receiving Calls
Once you have selected a phone number, set up a custom message, and assigned extensions, you are ready to receive calls, voicemails, and faxes. You can manage your phone calls and voicemails online or directly from your phone.
Setting up your virtual system has never been easier. No more waiting for a tech to come and install your systems!
Visit Our Knowledgebase to Learn More about Setting Up in 30 Minutes:
We’ve explained how to set up and get going today, but it doesn’t have to stop here. We have tons of other features that you may want to consider. Visit our Knowledgebase to learn more:


